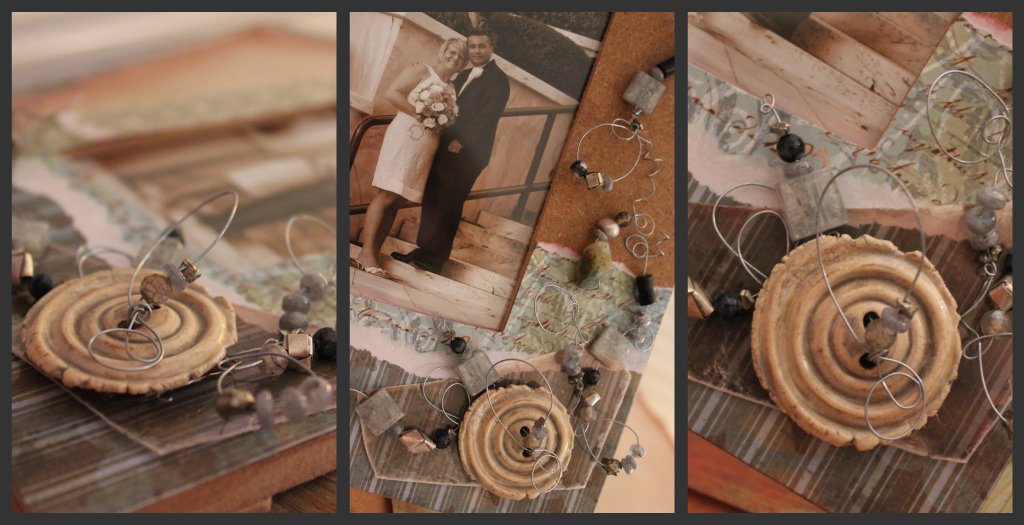
First off, I have to pat myself on the back for actually being done on time this month! Sure, it's Thursday night before the last Friday, but it's not Friday morning!! I luuuuuurve this button from Kristie's latest Artisan Clay Design Team stash so I wanted to do something really fun and funky with it. As part of my monthly challenge to get one project done on time, I was figuring I'd do something with the big button at ArtBliss...my phenomenal adventure last weekend (that I have yet to write about.) But, alas, it didn't come to pass. I've had lots of paper out lately working on boxes and beads and such, so I was thinking that maybe I'd try something more in the crafty lane rather than the jewelry lane. Lord knows how long I've had this frame stuck on my workroom shelf waiting for something to happen, but this was the week....
The challenge of this piece...to keep the focus on the button and not on distracting details. I was really worried about making sure the highlight of the frame design would bring out the best of the button. It would be really cool to put something more artsy like some calligraphy or an artful photo in the frame, but I settled on this black and white pic of me and my sweetie from our little Montgomery, Alabama, wedding back in 2008.
The finish on the button was a greyish blue, so I went through both my huge stashes of beads and paper to find some coordinating materials. I decided to keep it monochromatic in the spirit of keeping the attention on the focal (and whatever's in the frame!)
I left rustic edges and a lot of the plain wood of the frame showing because I liked the warmth of the color. I'd almost say I like the natural finish, but it's not really all that natural looking! haaaaaaaaa I tore the paper to keep it looking "imperfect" and funky. When I went through my scrapbooking phase years ago with my buds Lauren & Alicia, we were all into the tearing edges for "character" and I've remained a fan.
I shopped through my blue, grey, and silver bead drawers and came up with some fun little bits that bring out the color of the button's glaze but also play with the shapes...round and square. The kyanite squares are my favorites, but there are also some bamboo-shaped blue stones (maybe some sort of moonstone because they have a gorgeous luster) that are a great dark addition.
I tied all those shapes together with steel wire that I coiled and looped in what I deemed to be a pleasing arrangement. Then, I busted out the glue gun! I haven't had that baby out for ages...it still has wear and tear on it from my dried flower arranging phase. (yes, I've had a lot of phases...haaaaaaaaaa) Oh, and there's a bit of mica layered on there as well...just because it was on the table and I like the texture and color with the rest of the mix.
In closing....here's a Picnik collage (because I was having fun on there working my blog header!)

In actual FINAL closing...let me send you off to see what the rest of the Artisan Clay Design Team came up with this month!!
Oh....in really, I mean it, closing...there's an Artisan Clay trunk show at my local bead shop: Bead Haven, here in Hampton, Virginia, so if you're close by, I highly encourage you to check it out. Or, if need be, just tell me what you want and I'll shop! haaaaaaaaaaa (There is some seriously awesome stuff in those trays!)


